
Blinking an LED is an introductory Arduino project in which we control an LED using Arduino. LED blinking refers to the process of continuously turning an LED (Light Emitting Diode) and off in a repetitive pattern. It is a simple and common demonstration in electronics and microcontroller-based projects.
Components
- 1 X LED
- 1 X Resistor, 330 Ohm
- Breadboard
- Arduino UNO R4 or earlier versions
- Jumper wires
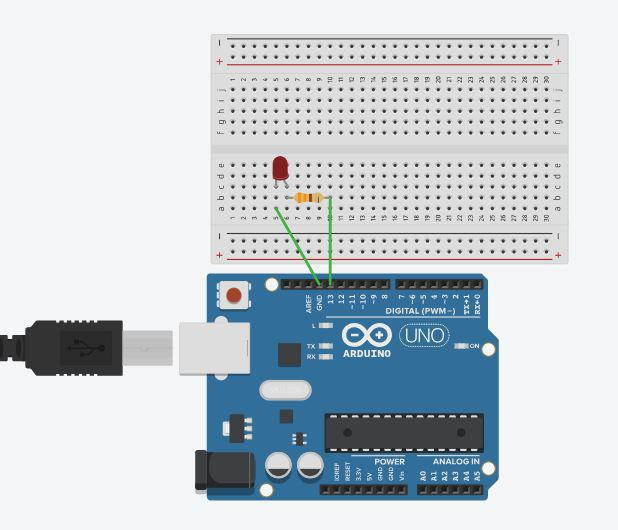
Circuit Diagram
- LED Connections: Connect the LED to the breadboard. The LED has two legs, the longer of which is the anode (positive) and the shorter of which is the cathode (negative).
- Resistor Connection: Insert one end of the resistor into the same row of the breadboard as the LED’s Anode. The resistor’s other end should be connected to the Arduino’s digital output pin.
- Ground (GND) Connection: Connect a jumper wire from the same row as the LED’s cathode to any Arduino board GND (Ground) pin. This connects the circuit to the ground of the Arduino.
Applications and Uses of LED Blinking
- Security Systems: To check the status of security systems
- Warning Signals: In battery-operated devices, LED blinking can be used to indicate low battery levels.
- Status Indication: LEDs can be used to indicate different states of a system. For example, in a home automation project, an LED might blink to indicate whether a device is connected to an internet network or not.
- In Testing and debugging.